MSI installation projects created in Visual Studio 2003 allowed the setting of a PORT value. This port value would be used to search the IIS sites and install the web application by default on the first site that corresponded to the specific port.
Users migrating from Visual Studio 2003 to Visual Studio 2005 have found that support for the PORT property has been removed and there are few technical options available to solve this problem.
This article outlines how using Visual Studio 2005 SP1 and a command line and MSI custom actions to install a web application on a site configured for a specific port.
After an update to VS 2008, I see no options that resolves this in VS 2008 either.
Visual Studio 2003 Background
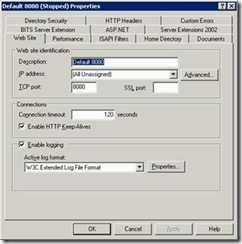
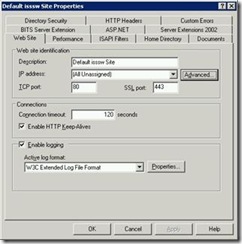
In IIS, on Windows Server 2003, multiple sites with multiple ports are used in most deployments. For example, if two sites are configured, one with port 80, the other with port 8080, they would appear as follows in the IIS administration tool.
In IIS admin, the port value and the host header value can also be set under the advanced settings.
If one wanted an MSI package to install a Web Application by default on the site that used port 8080, and the virtual directory to "TestWeb", Visual Studio 2003 made this easy.
- Select the File System view of the Web Setup project for the web application
- Select the properties view of the Web Application Folder
- Set the Port property to 8080
- Set the VirtualDirectory Property to "TestWeb"
If one wanted to pass this as a command line parameters the MSI these MSI properties could also be set.
TARGETPORT=8080
TARGETVDIR=TestWeb
TARGETDIR="C:\Program Files\..."
The property TARGETDIR can also be used to specify the physical path where the application should be installed.
Command Line Options for TARGETSITE
Msiexec /I "Websetup1.msi" TARGETSITE="/LM/W3SVC/1"
The problem with this approach is that the site will not be the same number on every server. We can use this approach to know what site number is used based on the port number assigned to that site. We can use the algorithm noted below in a VB script to find the server number and use the update the TARGETSITE on the command line.
- serverNumber = FindServerNumber( 9115)
- tgtSite = "/LM/W3SVC/" & serverNumber
- shell.Run "msiexec /passive /I """ & argInstallerName & """ TARGETSITE=" & tgtSite
Function FindServerNum(strPort)
    Dim MD_SERVER_STATE_STARTED, MachineName, IISObjectPath, IISObjects
    Dim ChildObject, ChildObjectName
    'Dim Servers
    Dim ServerNum, i, strBindings, strSvrPort, BindArray, binding
    Dim svrCount, arrCount, Servers(10), site
    svrCount = 0
    arrCount = 0
    i = 0
    MD_SERVER_STATE_STARTED = 2
    MachineName = "localhost"
    IISObjectPath = "IIS://" & MachineName & "/W3SVC"

    Set IISObject = GetObject(IISObjectPath)
    'Find all the server numbers pu into an array
    for each ChildObject in IISObject
        ChildObjectName = ChildObject.AdsPath
        ChildObjectName = Right(ChildObjectName, Len(ChildObjectName)- InStrRev(ChildObjectName, "/"))
    on error resume next
        ServerNum = Clng(ChildObjectName)
        If (Err = 0) Then
            Servers(arrCount) = ServerNum
            arrCount = arrCount + 1
        End If
    next

    'Get the port number and compare with the passed port number. If match, return the server number
    while i <= arrCount
        set site = IISObject.GetObject("IIsWebServer", Servers(i))
        ' Gets the Port Number of the current IISObject.
        BindArray = site.ServerBindings
    on error resume next
        strBindings = BindArray(0)
        If Err = 0 Then
            'remove the : char from begining and end of the port number
            strSvrPort = Left(strBindings, InStrRev(strBindings, ":") - 1)
            strSvrPort = Right(strSvrPort, Len(strSvrPort) - InStr(strSvrPort, ":"))
    on error resume next
            If cint(strPort) = cint(strSvrPort) Then
                If Err = 0 Then
                    If IISObject.ServerState = MD_SERVER_STATE_STARTED Then
                    ' Determines if this is our server. IIS can only have one
                    ' active port, so if the port is active it is the port where
                    ' the application is installed.
                    FindServerNum = Servers(i)
                    svrCount = svrCount + 1
                    exit function
                End If
            End If
        End If
        i = i + 1
    wend

    If svrCount = 0 Then
    ' Err.Raise 9999, "FindServerNum", "No Active Servers with the requested port were found. Port=" & strPort &  ". "
    End If

End Function
A copy of the script can be downloaded MSIInstallScript.zip.
Getting the TARGETSITE in a Custom Action
If you follow the basic line of logic from the article at Walkthrough: Passing Data to a Custom Action then getting the TARGESITE value is fairly simple.
- Create an Installer Class (Add new item, Installer class)
- Put the code in the installer class to process the parameters
Public Overrides Sub Install(ByVal stateSaver As System.Collections.IDictionary) ' Gets the parameter passed across in the CustomActionData. MyBase.Install(stateSaver) Dim strSite As String = Nothing strSite = Me.Context.Parameters.Item("SITE").ToString MsgBox("SITE=" & strSite, MsgBoxStyle.Information, "Custom Install") Me.Context.LogMessage("JS Action Before SITE=" & strSite) End Sub - Add the output from the installer class to the web installation (View File System, Add project output, select primary output from the project with the installer class)
- Create the custom action (View custom actions, add custom action, select Web Application Folder, select Primary output from the project with the installer class)
- 5. Set the CustomActionData property for the custom action as follows:
/SITE=[TARGETSITE] /PORT=[TARGETPORT] /VDIR=[TARGETVDIR] /TDIR="[TARGETDIR]\"
If you run the following command, you should see a message box that appears showing the SITE value.
msiexec.exe /qf /norestart /Liwearucmopvx! MSIInstall.log /i WebSetupald.msi
Setting the TARGETSITE in the Custom Action
So now we have read it, we should be able to set it.
Me.Context.Parameters.Item("SITE") = "/LM/W3SVC/1"
Actually, this is misleading, you can’t set the TARGETSITE. Ok, you can, but by the time you set it, the TARGETSITE has already been established and so setting it is a moot point.
If you actually run this, you will see there are two problems with this approach. First, the component that executes the custom action actually gets installed in the TARGETSITE and TARGETVDIR. Second, since the TARGETSITE has already been set in the User Dialog or Acquisition or User Dialog phase of gathering the data to set the properties for the installation.
The Windows Installer goes through a series of sequences for the MSI package: Initialization; User Dialog; Finalization or Rollback. A full explanation of these phases is best explain in the article Installation Phases and In-Script Execution Options for Custom Actions in Windows Installer.
Essentially, this is a chicken and egg problem. One can’t set the property in the custom action because by the time the custom action is invoked, the property for TARGETSITE is already set.
Phil Wilson also explains the same sequencing problem in his article Visual Studio Setup - projects and custom actions.
Conclusion
Essentially if you have to solve the problem of installing an application on a site with a specific port, there are two options. Set the TARGETSITE property and pass this as a parameter prior to invoking msi install, or moving to another tool like Windows Installation Studio 7 by Wise (aka Altiris) or InstallShield from Marco Vision. These products allow the creation of dialog windows which can be customized with further custom actions and logic far beyond what the Visual Studio 2003 or 2005 products allow.
References
- [1] Modifying Internet Information Services During Deployment with Custom Actions
- [2] How to Pass Command Line Arguments to MSI Installer Custom Actions
- [3] Walkthrough: Passing Data to a Custom Action
- [4] Visual Studio Setup - projects and custom actions
- [5] Building Custom Installer Classes in .NET
- [6] Custom Installer Actions: Edit Connection Strings, IIS Directory Security Settings, etc.
- [7] Windows Installer XML (WIX) Toolset
- [8] How to get the installed WebSite in VS2005 WebSetup installer customAction?
- [9] How do I set property in Custom Action?
- [10] Windows Installer Custom Actions
- [11] ] Installation Phases and In-Script Execution Options for Custom Actions in Windows Installer

